
This post was most recently updated on August 13th, 2021
The first step of running a header bidding solution on your website is to sign up with an ad network/SSP that maintains the ability to run header bidding.
Write a simple email to the ad representative presenting your website and let them know that you are interested in implementing their demand in your Header Bidding configurator.
After they approve your website, you need to get the Placement ID or PIDs from the ad network. PIDs are identification details which show the ad network on which ad unit they are bidding and placing their ad if they win the header bidding auction.
Please note, that often apart from PIDs the ad network will provide you with other parameters specific for their set up (like network ID, tag ID, a server used, etc.).
You can get those PIDs and the additional details mainly in two ways:
Method #1 – Request them from the ad representative. They will be the one generating them for you. You just need to copy and paste them in your header bidding configurator set up.
Method #2 – Generate the PIDs yourself.
Expect to receive 1 PID per ad unit. That means that if your ad unit accommodates more then one size, you will still get just one PID for all the sizes.
You can request the PIDs from the ad representative, but you can also create them yourself (see below on how to do that).
Their PIDs are sizeless which means the ad representative will give you PIDs that can target any ad unit size.
Ask for the parameters from the ad representative. They will provide you with one tag ID per ad placement. If your ad placement has a flexible size, then prioritize the main and most popular ad sizes: 300×250, 160×600, 300×600, 728×90.
You can get the PID from the ad representative. Usually, they will send you separate PIDs for desktop and mobile. Expect them to be sent via GitHub.
After the ad representative creates a login for you for their User Interface, you will be the one generating the PIDs. Below, we’ve listed instructions on how to do that for 5 of the biggest ad networks and SSPs:
Once approved log in to https://b3.districtm.ca/login
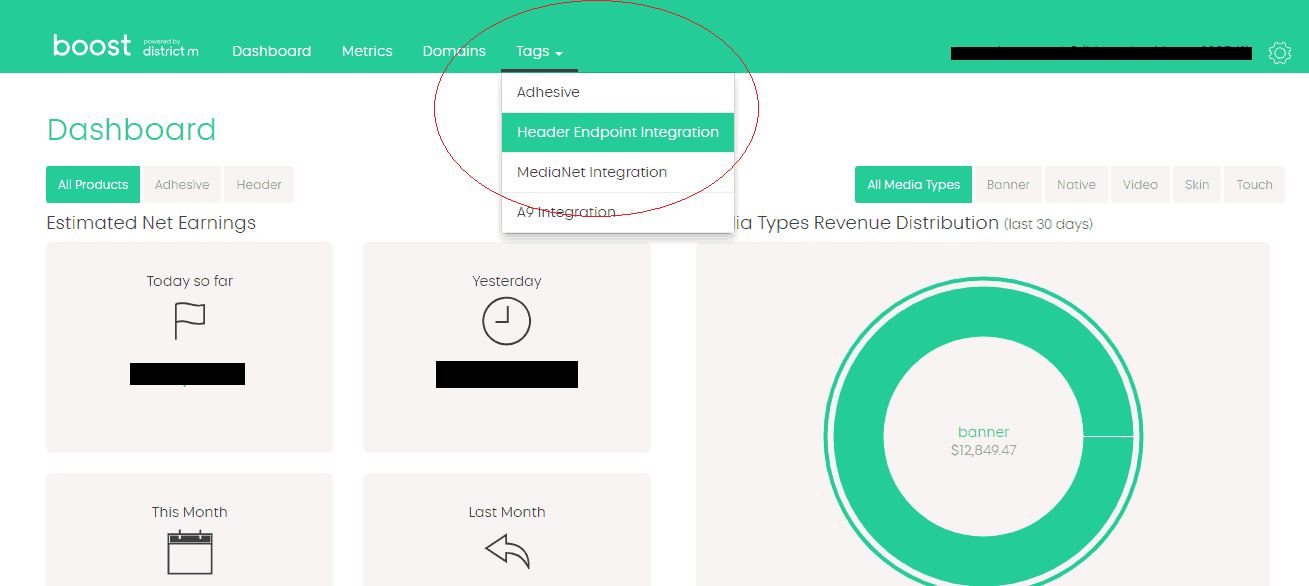
Click “Tags” -> “Header Endpoint Integration”:
Click “Zones” on the upper left:
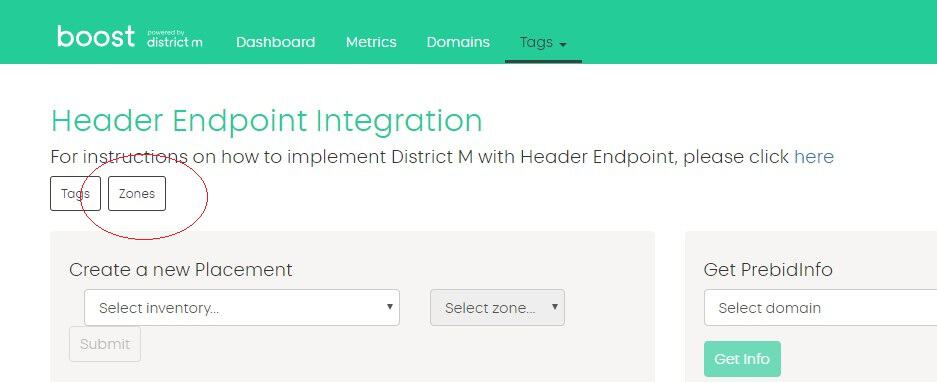
Enter the Zone Name (= ad unit name), select a relevant domain (if you have applied for only one website, you will see its domain only), select position (above or below the fold) and click “Submit”:

Repeat the same steps above as needed and click on “Tags” on the upper left corner of the UI. Then get the DMX or AppNexus PIDs* you need for the relevant position:
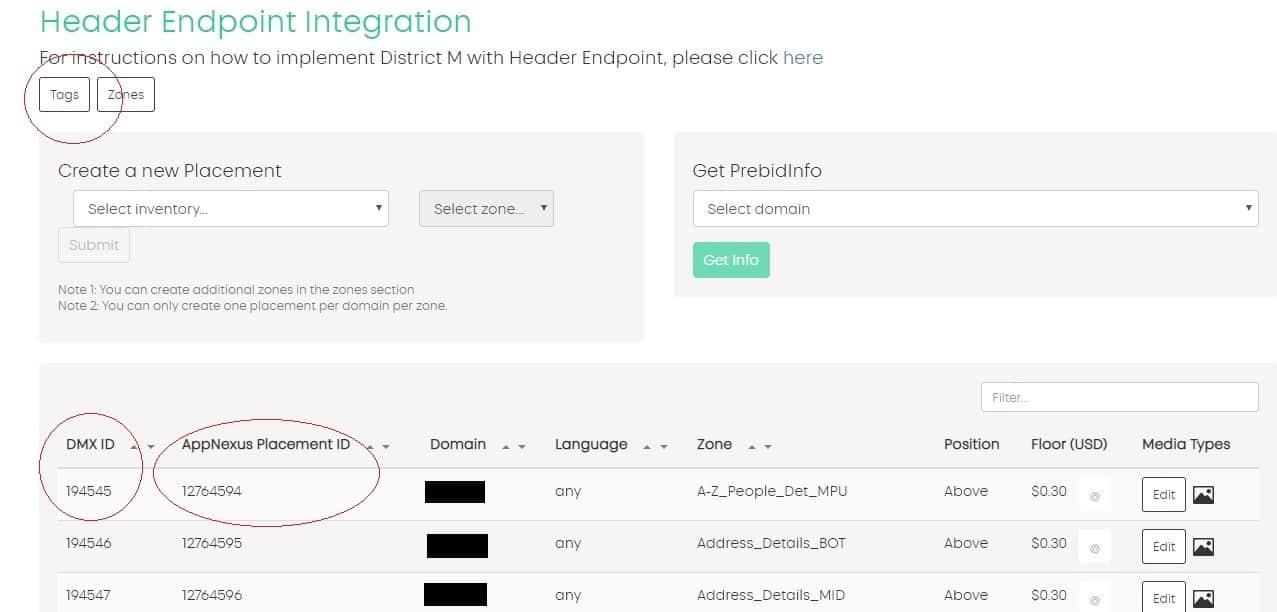
*DistrictM runs both AppNexus and their own (DMX) demand. Also, notice that DistrictM sends out gross RPM bids. This means that you have to set up a bid scaling percentage that is equal to the percentage of the publisher revenue share for that account.
After your website gets approved by Sovrn and you receive your credentials log into https://meridian.sovrn.com/
Click on “Ad Tags” and then on “Create Ad Tag”

This will open a window where you can fill in the different parameters you need for your PID:
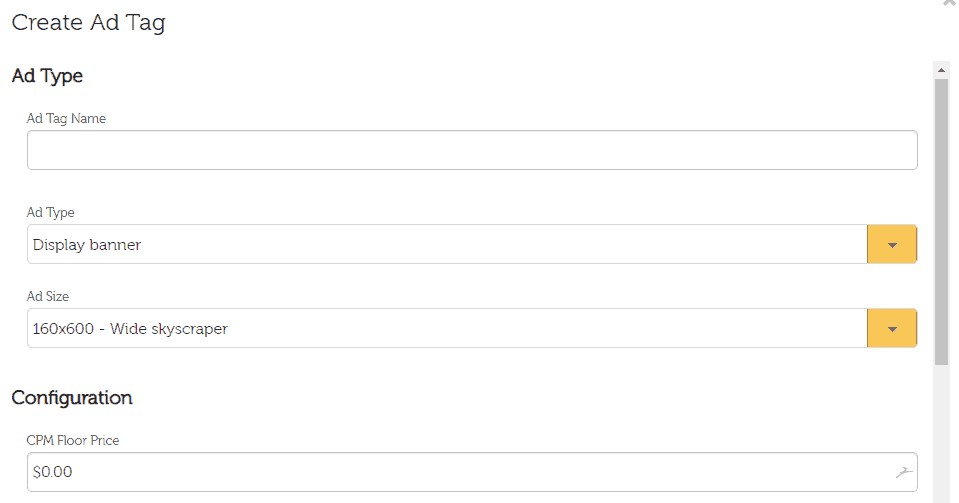
Enter an Ad Tag Name (your ad unit name), choose Ad Type (Display (Desktop) or mobile banner), the ad size you need and any CPM Floor Price you might want to set up. You also have an option to paste a passback tag (not needed in this case as you will be running header bidding).
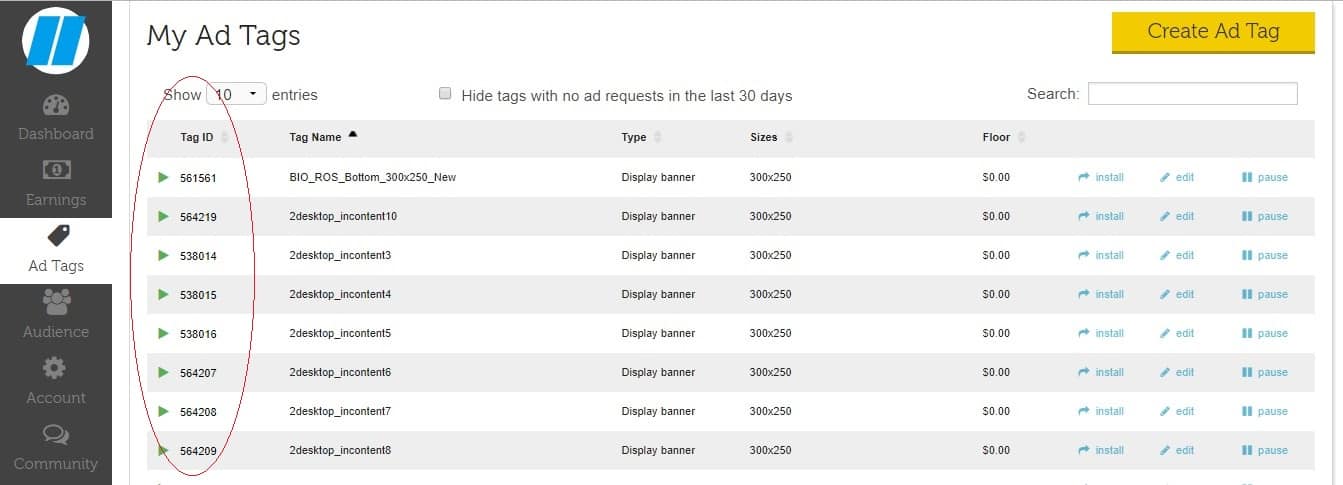
After you click “Save” you can get your PIDs on the far left corner of the Sovrn UI:
Once your website gets approved by AOL Header Bidding department, you need to create your placement at the AOL header bidding dashboard.
You do that by going to “Inventory tab” and choose “Create Website”:
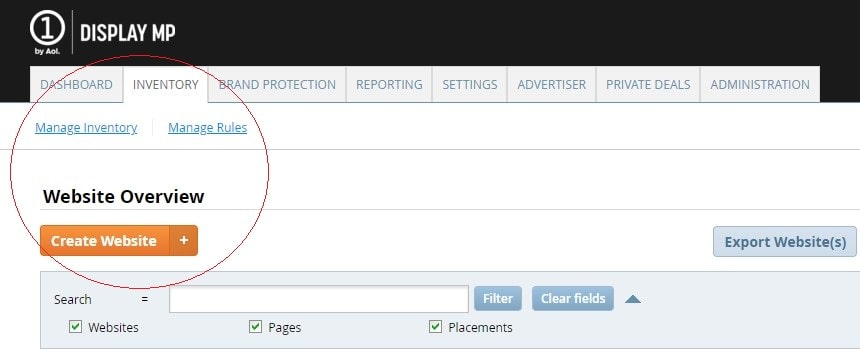
After that, search for your newly created website in the search box and click “Create Pages for -your website- HB.”

Create all the pages you want. If you are going to use a Run of Network set up you will only need to create one page. Then you will need to create the placements for those pages:
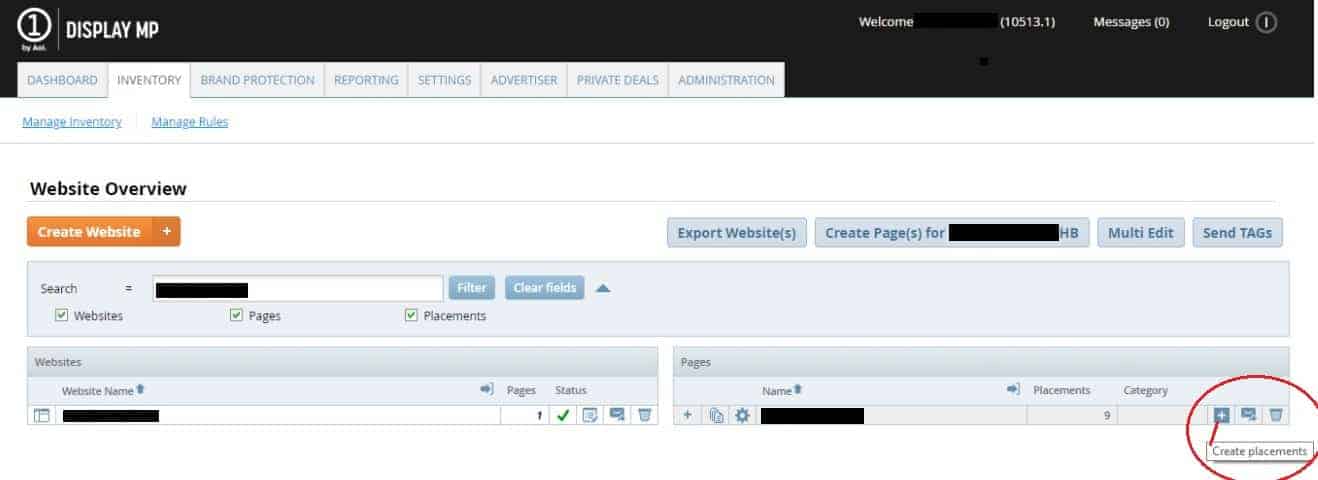
At the “Placement” section you need to put the names you want and the associated sizes:
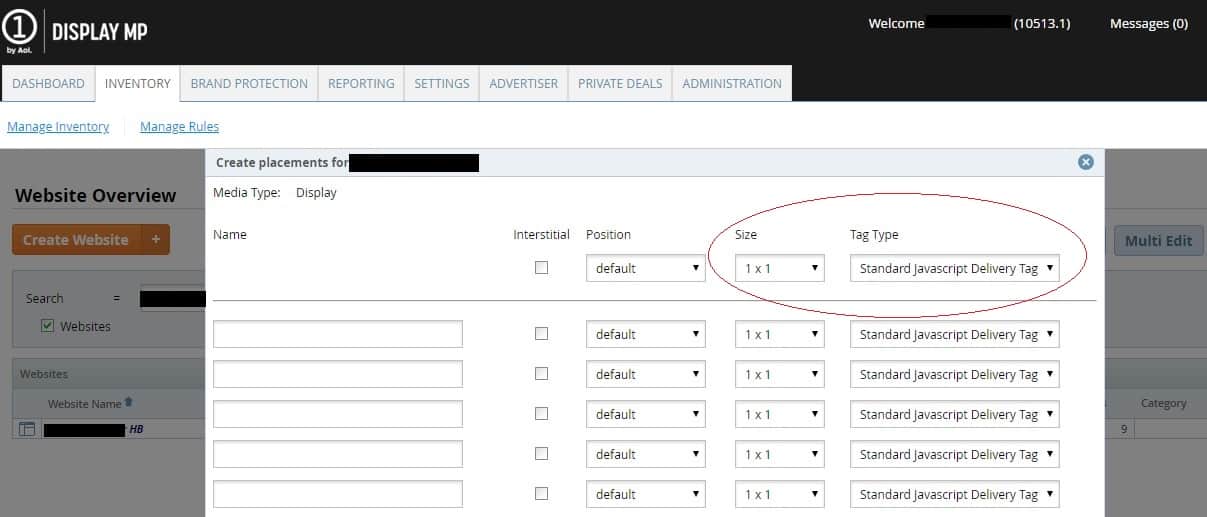
For “Tag Type” choose “Standard Javascript Delivery Tag” when creating desktop tags and “Dynamic Mobile Tag” for mobile tags.
After that, your Placement ID’s will show up here, at the “Pages” section where you have to click the + button to show the Placement ID:
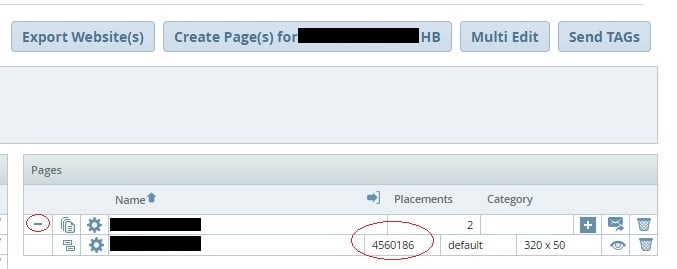
Note that you shouldn’t set the PIDs live yet – first, you need to tell the AOL Ad representative that you have created them, they will activate them, and then you are good to go.
After your website gets approved by OpenX header bidding solution log in to their header bidding dashboard, select “Inventory” and click on “Create Publisher Account”:
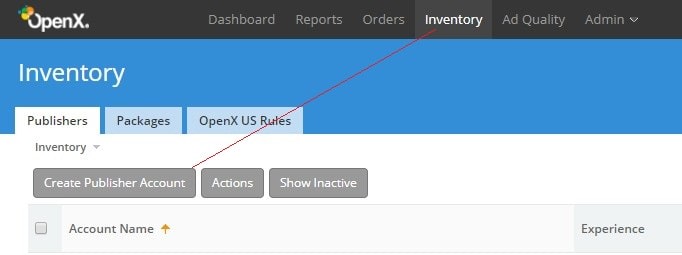
After you fill in all the necessary information go ahead and create ad units:

Again, fill in all the necessary information you need for the ad unit and after saving them click on “Export Ad Tag”:

This will download a text file automatically with different parameters you might need for your header bidding configurator. In this case, we will show you where exactly is the Placement ID situated:
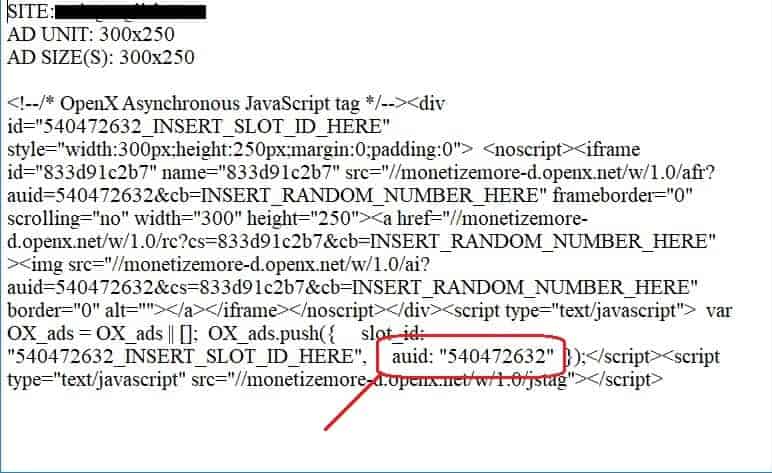
Some Ad networks and SSPs will not provide you with a specific Placement ID but with other parameters. An example for this would be Smart Ad Server.
Once Approved go to “Administration” -> “Websites & Pages”:
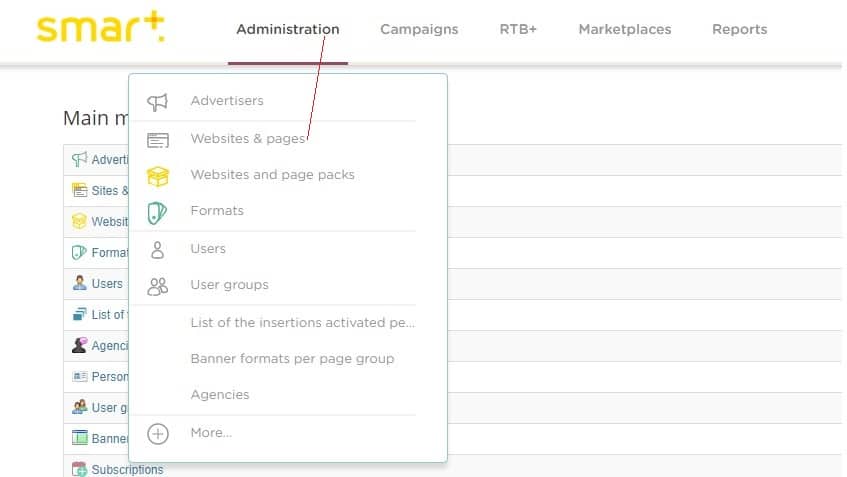
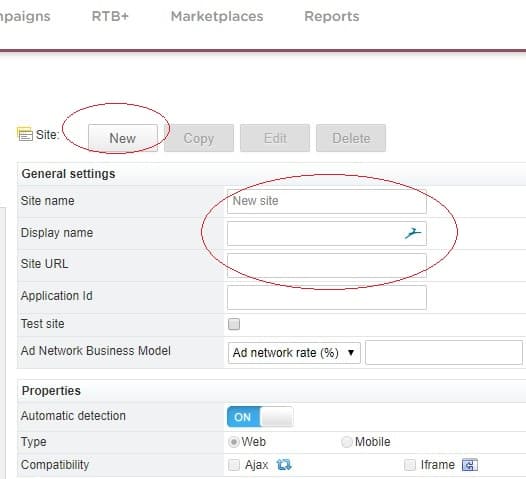
Create your website in the Smart Ad Server database by clicking “Site: New” and filling out the necessary information (it’s ok if you fill just the first three boxes):
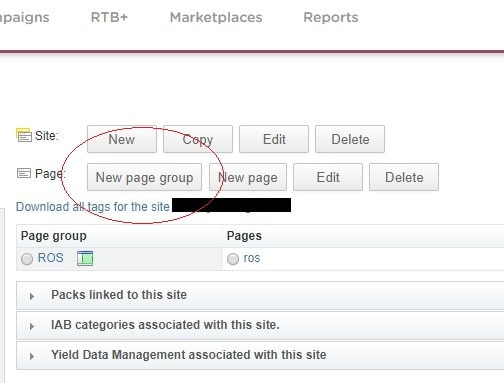
After that you need to create a “New Page Group” which you can name ROS or Run of the site:
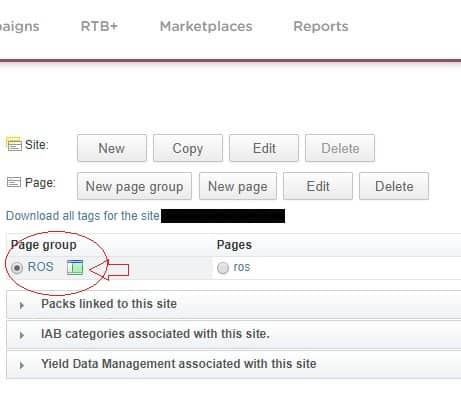
Then you need to click on the small button right next to where it says “RON”:
This will open up a box where you can select all the sizes you need for your inventory:
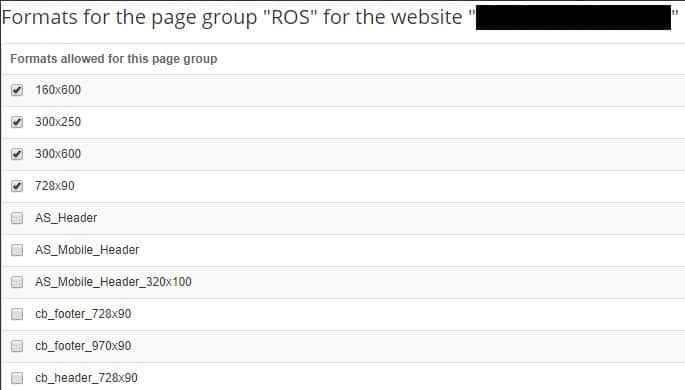
After selecting the ones you need, click the + button right next to your website and then click “ROS” below it. That will lead you to the “Tags ” tab on the right:
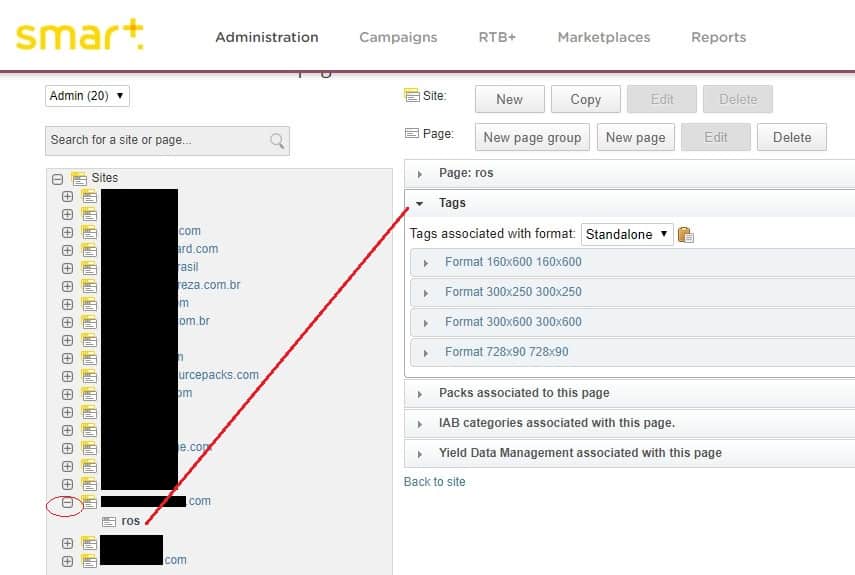
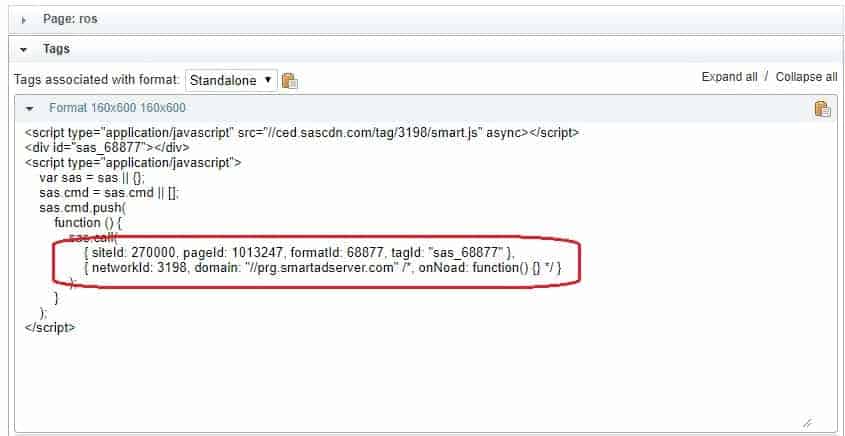
Then grab the parameters you need for your header bidding configurator like siteID, pageID, tagID, etc.
There you have it! Now you know how to get Placement IDs for most of the top header bidding ad networks and SSPs. Apart from our ad optimization services, MonetizeMore also offers proprietary and state of the art header bidding solution called PubGuru.
To find out more about our header bidding technology and how our team of ad ops specialists can assist you to maximize your ad revenue. Sign up for a Professional account at MonetizeMore today!
10X your ad revenue with our award-winning solutions.