Fluid is a native ad size recommended by Google. It has no definite size and automatically adjusts according to the inventory dimensions. It allows flexibility in customizing an ad and works seamlessly with responsive ad tags. It has been available in Ad Exchange for quite some time and has been getting high coverage and eCPMs contributing to the increase of a site’s overall performance.
When you consider adding native formats to increase inventory demand, adding the fluid ad size can definitely help. You can choose to use your existing ad units for targeting or create a new one. If you have deployed and been running the ad units on the page, you will need to update the code and ad fluid size as well. Here’s a step-by-step guide to help you set up Programmatic Natives in Google Ad Manager:
1) Go to Inventory > Ad Units > Ad unit setting > Sizes > Add fluid size
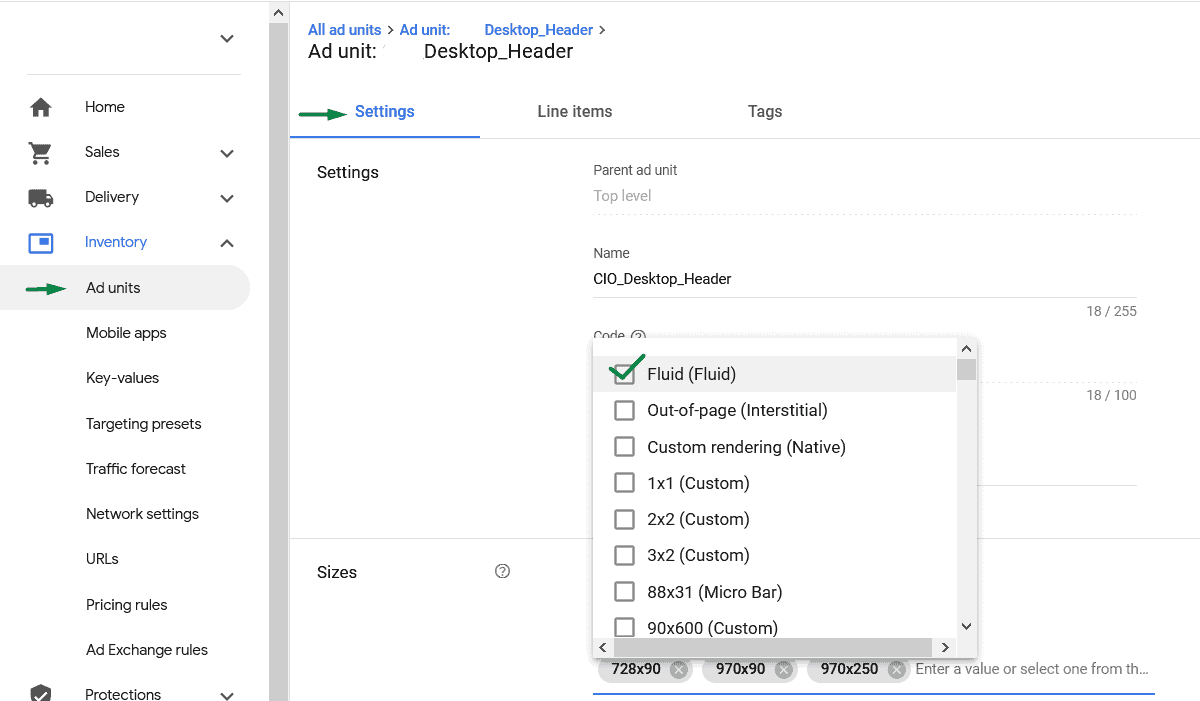
2) Create native Styles
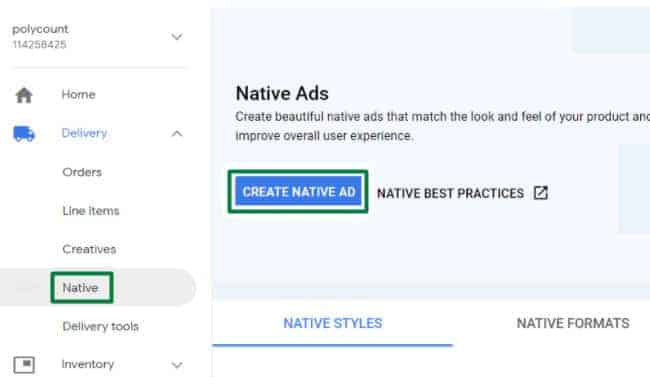
a) Go to Delivery > Native > Create Native Ad
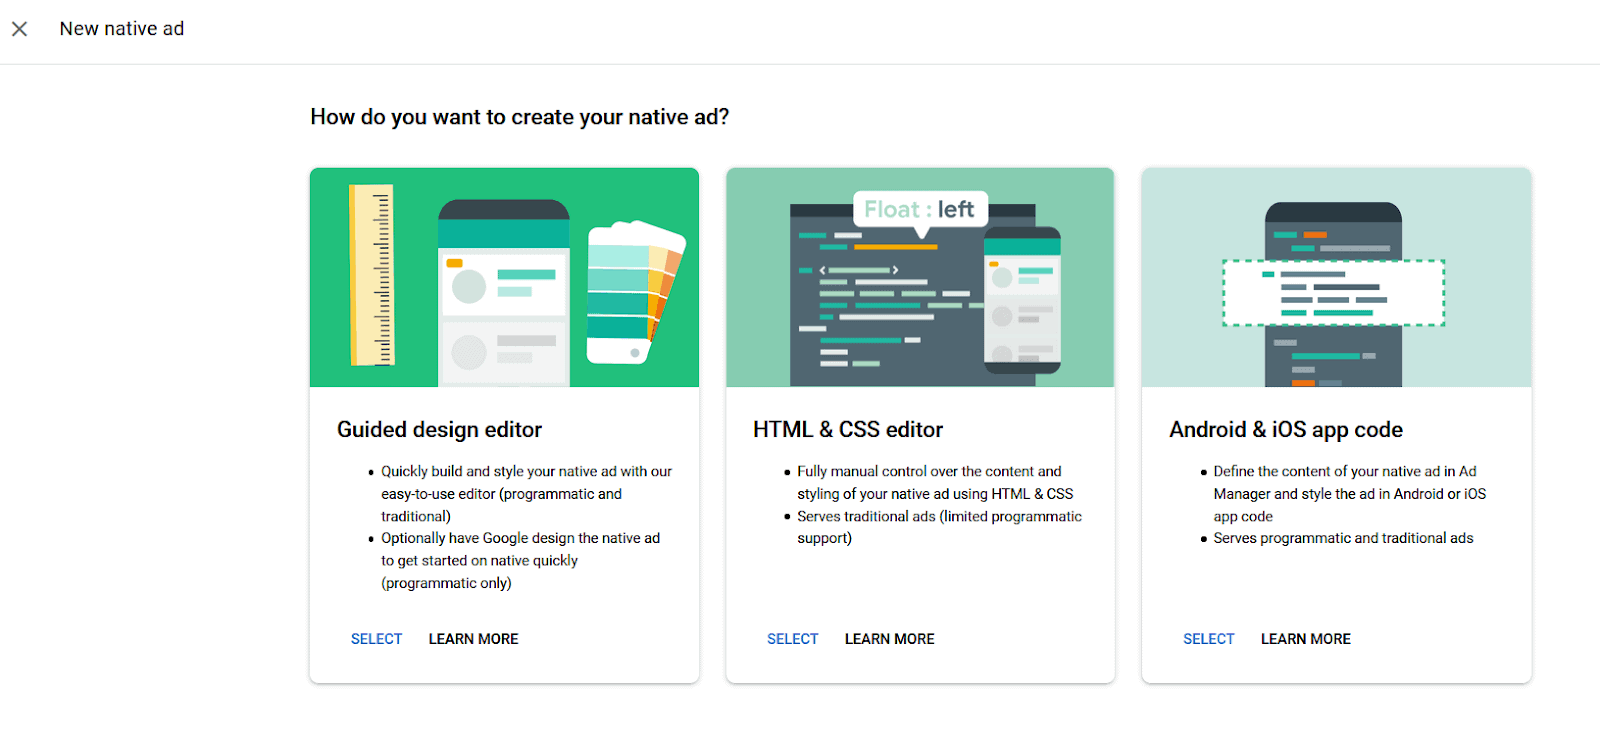
b) Select how you would want to create your native ad.
3) Add Native style name, select path, and add choose fluid for the size. Click Continue.
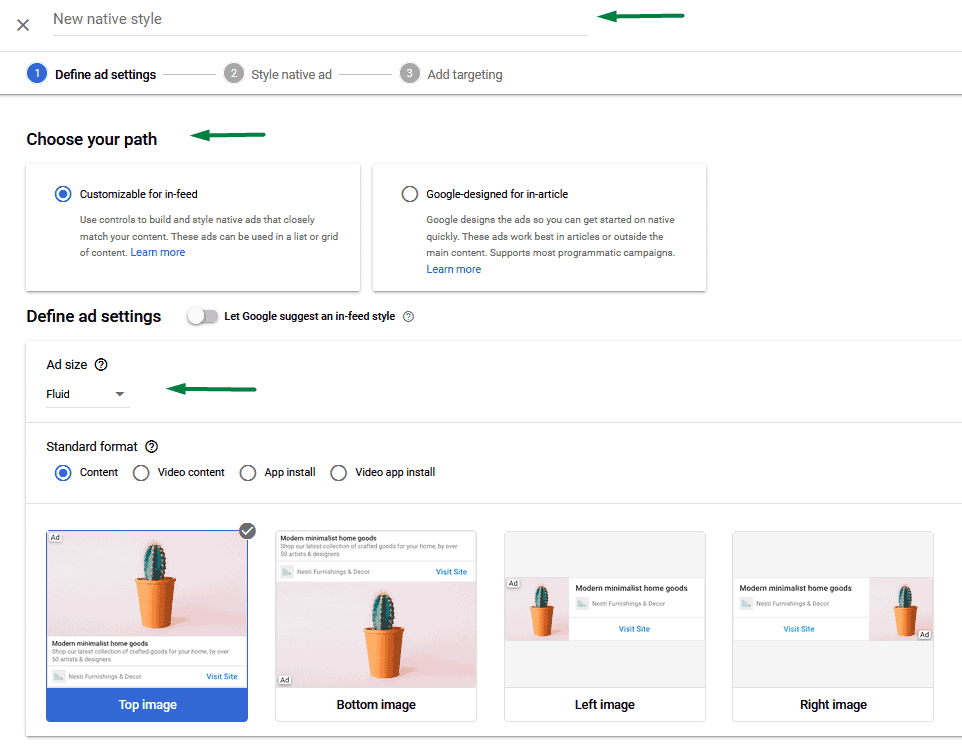
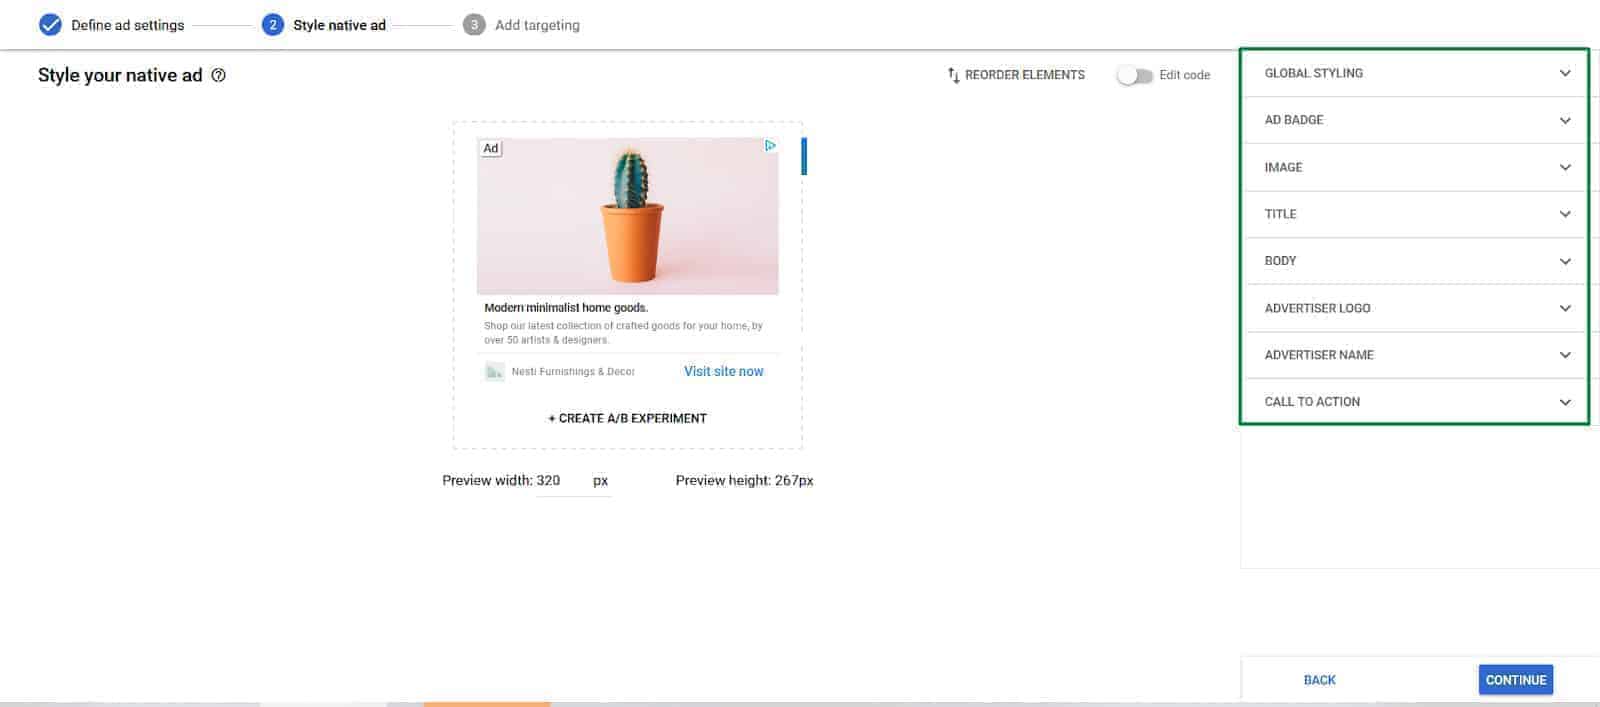
4) Select your preferred settings or just click Continue if none.
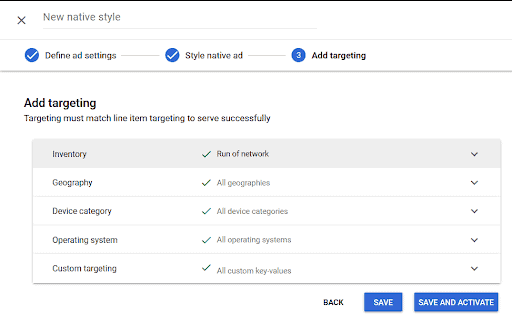
5) Add targeting and save.
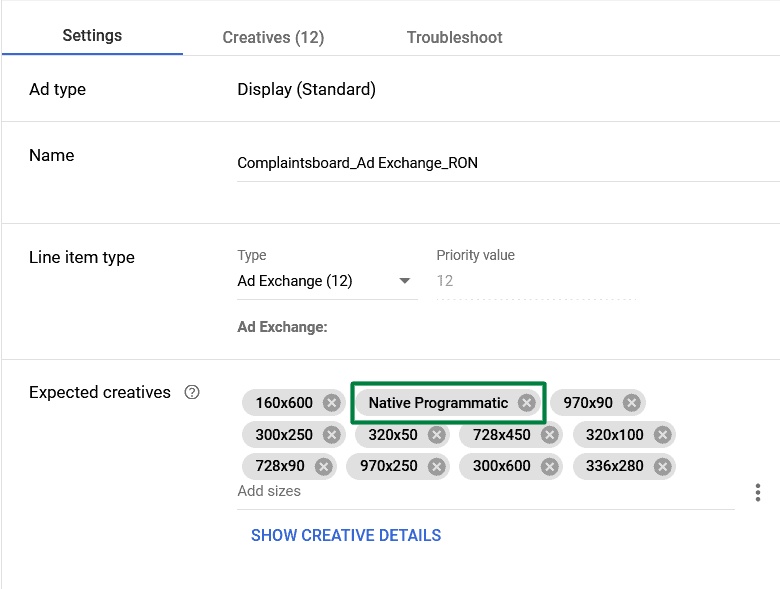
6) In your Ad Exchange Line Items, you will need to add Native Programmatic in the inventory sizes.
7) Auto-generate creatives for each Ad Exchange Line item.
8) Follow the steps below on how to generate a report and check the performance:
a) Open your Google Ad Manager account
b) Go to Reports > All Queries > New Queries
c) Report type: Historical
e) Set the date range
f) Add Dimensions and metrics needed
g) Run Report.
You can choose to compare performance by size, ad unit, and native styles depending on the report that you need. Adding more native styles with fluid ad sizes creates new opportunities in your inventory and can help you increase your ad revenue. Need help setting up fluid ad sizes, optimizing your ad inventory, setting up header bidding, and more? MonetizeMore is Google Certified Publisher Partner, ready to help take your ad revenue to the next level! Sign up to MonetizeMore today.


10X your ad revenue with our award-winning solutions.